Sunday, March 18, 2012
For the Birds Project, Part 3
The end results of my For the Birds Project...click the link of this post to see the pics.

Tuesday, March 13, 2012
Random Post: The many uses of plastic grocery bags
If you are anything like me, I forget to bring my reusable grocery bags into the store with me. When I go to the grocery store I always end up putting my groceries in those plastic bags. The plastic bag storage I keep under my kitchen sink gets over full and starts spilling over and getting in the way of everything. There are places that recycle these plastic bags (I know for sure Target has a container inside the store), but these plastic bags have some handy household and everyday uses.

· Use them for a small trash can liner.
· Use them for putting dirty diapers in.
· Use it as a container for used cat liter.
· If you are going on a walk with your dog who decided to do the doo in your neighbor’s lawn. Use it as a container for picking up after your dog.
· Use it as packing material.
· You don’t have any rain boots and have to walk through some mud. Take a bag, put your foot inside, and tie the handles together around your ankle. You may need more than one for this one.
· Use them as small lawn clean up bags.
· Use them in place of rubber gloves if you don’t have any gloves handy.
· Use a bag to get a credit/debit card to swipe. Place the card inside the bag tightly against the card, and swipe. I have no idea why this works, but it does.
· Use them as flags.
· Use them as dirty laundry when you are traveling.
· Use them to protect a plaster cast so you can take a shower.
· Use them as freezer bags.
· Use larger bags to cover clothes in a closet or while traveling to keep clothes clean.
· Use large ones to slip over ceiling fans when cleaning the blades to catch the dust and keep it from falling on the floor.
· Use them as a toy parachute.
· Use them as sick bags when someone has a sour stomach.
· Use them as a rain bonnet.
· Put them on your wiper blades and mirrors in the winter to keep them free from snow and ice.
· Store your shoes in plastic bags when you have to travel to the rest of your clothes don’t smell like stinky feet.
· Store wet paint brushes in them after you’ve washed out the paintbrush.
· Use them to store rags in.
· Use one to store the rest of your plastic bags in.
· Stuff one or a few in the bottom of a flower pot, then add your dirt, and flowers. It helps the flowers stay moist and not have the water run out of the bottom of your pot (if it has holes in the bottom).
Wednesday, March 7, 2012
Recipe: Balsamic Pork with Shallots
Yet another sucessful dinner! Tonight was this amazing balsamic pork with shallots, asparagras, and a ceasar salad.


5 teaspoons olive oil, divided
1 (1 pound) pork tenderloin, trimmed and cut crosswise into (1/2 inch thick) slices
1/2 teaspoon salt, divided
1/2 teaspoon freshly ground black pepper, divided
2 1/4 cups thinly sliced shallots (about 8)
1/2 cup water
2 tablespoons balsamic vinegar

Heat 1 tablespoon oil in a large nonstick skillet over medium-high heat.
Sprinkle pork with 1/4 teaspoon salt and 1/4 teaspoon pepper.
Add pork to pan; cook 3 minutes on each side or until done.
Remove from pan, and keep warm.
Add remaining 4 teaspoons oil to pan; reduce heat to medium.
Add shallots to pan; cook 10 minutes or until tender, stirring occasionally.
Add garlic; cook 2 minutes.
Stir in 1/2 water and vinegar; simmer 6 minutes.
Stir in remaining 1/4 teaspoon salt and remaining pepper.
Spoon shallot mixture over pork.
Serve immediately.

Cooking Light March 2009
Monday, March 5, 2012
Recipe: Rib-Eye Steaks with Spring Mix, Pear, and Blue Cheese Salad
Tonight's dinner menu:
Rib-Eye Steaks
Spring Mix Salad with Pear and Crumbled Blue Cheese
Roasted Potato slices
Sopapilla Cheesecake
Sopapilla Cheesecake
I have definitely mastered cooking chicken. One of my goals is to master cooking beef. In the past times I have tried to cook it, it usually ends up being tough or overcooked. But the only way I am going to learn to cook a great piece of beef is to keep trying to cook it. Tonight, I think, I finally came to that point. I’m getting closer, not quite there, but almost, so close.
Rib-Eye Steaks
4 8-9 ounce rib-eye steaks (each about 1 inch thick), trimmed
Coarsely cracked black pepper
Olive Oil
I used a grill pan and poured a little drizzle of olive oil and turned the heat up (to medium-high) till the pan was smoking hot. I seasoned each steak with salt and pepper, and placed the steaks in my square grill pan. I cooked each side until I couldn’t see any red meat, about 4-5 minutes per side. My hubby likes a well done steak. I tend to like mine a little pink in the middle. Once the steak was done to our likeness I put it in a dish to let it rest.
Potato Slices
3-4 Russet potatoes, sliced
3-4 Russet potatoes, sliced
Olive oil
Seasoning salt
Herb Mix
I took some russet potatoes, scrubbed the outside and sliced each potato on my mandolin so the slices were thin and would cook evenly. I took a rectangle baking sheet and added a piece of aluminum foil to the bottom, drizzled olive oil on the foil (so the potatoes wouldn’t stick), added the potato slices so there were no overlaps, drizzled a little bit more olive oil on each potato slice, sprinkled with seasoning salt and herb mix and put them in the oven at 450 degrees for 20 minutes.
Spring Mix salad with Crumbled Blue Cheese and Pear
Spring Mix lettuce
3 tablespoons olive oil, divided
1 tablespoon Sherry wine vinegar
1 tablespoon minced shallot
1 ½ tablespoon honey
1 small ripe pear
1/3 cup crumbled chilled blue cheese
I had a Spring mix of lettuce I added to a bowl. I added the blue cheese, and pear on top of the lettuce. In a small mixing bowl I combined the oil, vinegar, shallot, and honey. The very last thing I added to the salad is the dressing. You don’t want the salad to get wilted and soggy before it is served, so this is really the very last thing you do after all the other dishes are ready.
This dinner was a HUGE success. The only thing left was a little bit of steak. My husband is still oohing and awing about how satisfying and delicious dinner was. The flavors in the salad were so delicious and complimented the potatoes and steak perfectly. The steak was absolutely tender and juicy, however a little more red than I liked, but I made sure that hubby’s steak was not pink. His steak was even tender and perfect for him.

What a very exciting feeling about dinner.
The end results of dinner!
To top it off I made Sopapilla Cheesecake. This is the most easy, unbelievably yummy cheesecake ever!
2 cans Pillsbury butter crescent rolls
2 (8 ounce) packages cream cheese (softened)
1 cup sugar
1 teaspoon vanilla extract
1/4 cup butter (melted)
Cinnamon and Sugar
Unroll and spread 1 can crescent rolls on bottom of an ungreased pan.
Combine softened cream cheese, sugar, and vanilla.
Spread mixture over crescent rolls.
Unroll and spread remaining crescent rolls over mixture.
Spread melted butter over the top and sprinkle with cinnamon and sugar.
Bake at 350 degrees for 20-30 minutes.
It's that simple.

Thursday, March 1, 2012
Organizing: Kitchen Gadget Drawer
I decided to organize my kitchen gadget drawer next. You can check out the results by clicking the title of this post.

Wednesday, February 29, 2012
Being Crafty: For the Birds Progress
I have made progress on the For the Birds project. You can check out the latest by clicking the title of this post.
Thursday, February 23, 2012
Being Crafty: For the Birds
I have been working on my next project. To take a sneak peek at what I'm working on click the title of this post to read more.


Tuesday, February 21, 2012
Organizing: Medicine (Adult and Children's) Cupboard
I organized our medicine (adults and children's). See the before and after pictures. Just click on the title of this post.

Friday, February 17, 2012
Organizing: Hutch Scrapbooking Organization Project Part 6 Unveiling
So here it finally is...the moment we have all been patiently waiting for...the unveiling of my refurbished hutch and made into my scrapbooking storage. Click the title of this post to see the before and after pictures.
Wednesday, February 15, 2012
Organizing: Hutch Scrapbooking Organization Project Part 5
To read an update about the Hutch Scrapbooking Organization Project, click the title of this post.
Tuesday, February 14, 2012
Random Post: Happy Valentine's Day
A great big Happy Valentine's Day to all my blog readers. You are appreciated in so many ways.

The Story of Life
At this time of year we should all reflect on our life. Sometimes people come into your life and you know right away that they were meant to be there, to serve some sort of purpose, teach you a lesson, or to help you figure out who you are or who you want to become. You never know who these people may be (possibly your roommate, neighbor, coworker, long-lost friend, lover, or even a complete stranger), but when you lock eyes with them, you know at that very moment they will affect your life in some profound way.
And sometimes things happen to you have may seem horrible, painful, and unfair at first, but in reflection you find that without overcoming those obstacles you would have never realized your potential, strength, will power, or heart.
Everything happens for a reason. Nothing happens by chance or by means of good luck. Illness, injury, love, lost mements of true greatness, and sheer stupidity all occur to test the limits of your soul. Without these small tests, whatever they may be, life would be like a smoothly paved, straight, flat road to nowhere. It would be safe and comfortable, but dull and uterly pointless.
The people you meet who affect your life, and the success and downfalls you experience, help to create who you are and who you become. Even the bad experiences can be learned from. In fact, they are probably the most poignant and important ones.
If someone hurts you, betrays you, or breaks your heart, forgive them, for they have helped you learn about trust and the importance of being cautious when you open your heart.
If someone loves you, love them back unconditionally, not only because they love you, but because in a way, they are teaching you to love and how to open your heart and eyes to things.
Make everyday count. Appreciate every moment and take from those moments everything that you possibly can for you may never be able to experience it again. Talk to people that you have never talked to before, and actually listen. Let yourself fall in love, break free, and set your sights high. Hold your head up because you have every right to. Tell yourself you are a great individual and believe in yourself, for if you don't believe in yourself, it will be hard for others to believe in you. You can make of your life anything you wish. Create your own life and then go out and live it with absolutely no regrets. Most importantly, if you love someone tell him or her, for you never know what tomorrow may have in store...and learn a lesson in life each day that you live.
- Author Unknown
Monday, February 13, 2012
Organizing: Organizing Tools
I reorganized my tools and hardware. Read about it here.
This was the old, overstuffed toolbox where nothing was organized, the lid could barely close, and hardware was hard to find.

Recipe: Rosemary & Roasted Garlic Chicken
 This chicken was just delicious. My husband found this Kraft Fresh Take package hanging in the cheese section. The only way to know if something like this is going to be good is to try it and that is exactly what we did.
I had thawed a package of chicken tenderloins and opened the Kraft mix and coated the chicken. I sprayed a baking dish with Pam spray so the Kraft mix (which has cheese in it) wouldn't stick and be a terrible mess to clean up. Preheat you oven to 375 degrees and let the chicken cook for 28-30 minutes. It smells incredible and the chicken comes out super tender.

Sunday, February 12, 2012
Recipe: Pretzel Buttons
These little desserts are so easy and very versitile. All it takes is 3 ingredients and some assembling time.
1 bag of Snaps pretzels
 1 bag of Hersheys kisses OR Hugs OR Rolos
You can do red, pink, and white M&Ms for Valentines Day, red and green M&Ms for Christmas, blue and white M&Ms for a boy baby shower, the options are ongoing.


1 bag of Snaps pretzels
 1 bag of Hersheys kisses OR Hugs OR Rolos
1 bag of M&Ms
Preheat oven to 200 degrees.
Take a baking pan and place some tin foil or parchment paper to outline bottom.
Place pretzels in rows until entire bottom of pan is covered.
Unwrap individual candies and place one on top of each pretzel.
Place in preheated oven for 6 to 10 minutes until soft and melted but still has kept original form of candies.
Take out of oven and place one M&M on top of each melted chocolate.


Enjoy!
Saturday, February 11, 2012
Organizing: Hutch Scrapbooking Organization Project Part 4 Painting
To read an update on the progress of my hutch scrapbooking organization project just hit the title of this post.
Tuesday, February 7, 2012

Friday, February 3, 2012
Random Post: Foodgawker Web site
I just happened to come across this Foodgawker Web site while on Pinterest. I also have the Foodgawker app on my iphone. I love the big food pictures and how clear and crisp everything seems. The recipes look so delicious I can't wait to try a few.
The site also has other categories at the very top left side of the page: Dwellinggawker, which has home and decorating ideas. Weddinggawker, which has some darling wedding ideas from planning to the actual wedding day. Craftgawker, which has tons of categories of craft ideas from Accessories to Woodworking.
All for now! I just had to share all the yumminess I found.
Enjoy!
Tuesday, January 31, 2012
Recipe: Foil-Wrapped Ginger Chicken

Foil-Wrapped Ginger Chicken
The brown sugar and soy sauce marinade tenderizes the meat and cooks down into a sticky, delicious savory sauce.
1 Tablespoon each soy sauce (regular) and white granulated sugar
1/4 teaspoon crushed crystalized ginger
8 chicken breast tenders
4 green onions, cut into 2 inch strips
Freshly ground black pepper
In a medium size bowl, combine the soy sauce, white sugar, and ginger.
Add chicken, toss to coat, cover, and chill for at least 1 hour and up to overnight.
Preheat tthe oven to 375 degrees.
Lay out 3-4 pieces of aluminum foil, 6 to 8 inches long.
Put 1/8 of the marinated chicken in the middle of each.
Top chicken with green onions and sprinkle with black pepper.
Fold 1 side of foil over the chicken to cover it, fold opposite side of foil over first fold, and then fold in each end once to seal and create a little packet.
Lay packets on a foil or parchment paper rimmed baking sheet (packets will leak while cooking, and the marinade is difficult to clean up once it cooks onto a pan).
Bake until chicken is cooked through and marinade is reduced and starting to caramelize in each packet, 45 to 60 minutes.
Serve hot or warm.
Make 4-6 servings
Recipe adapted from Sunset magazine April 2008
Sunday, January 29, 2012
Recipe: Penne and Cauliflower with Mustard Breadcrumbs
8 ounces penne rigate (2 1/2 cups)
5 cups small cauliflower florets
2 tablespoons (1/4 stick) butter
1 1/2 tablespoons Dijon mustard
1 1/2 cups fresh whole wheat breadcrumbs made from crustless country-style bread
3/4 cup (packed) freshly grated Parmesan cheese plus additional (for serving)
1/2 cup heavy whipping cream
2 teaspoons finely grated lemon peel
Cook pasta in large pot of boiling salted water 5 minutes, stirring occasionally.
Add cauliflower.
Cook until cauliflower is tender and pasta is tender but firm to bite, stirring occasionally, about 6 minutes.
Drain pasta and cauliflower, reserving 1/2 cup cooking liquid.
Return pasta and cauliflower to pot.
Meanwhile, melt 2 tablespoons butter in large nonstick skillet over medium-high heat.
Whisk in Dijon mustard.
Add breadcrumbs.
Cook until breadcrums are golden and crisp, stirring to break up clumps, 7 to 8 minutes.
Transfer breadcrumbs to medium bowl.
Add 3/4 cup grated Parmesan, cream, lemon peel, and 1/2 cup cooking liquid to pasta mixture in pot.
Toss over medium heat until sauce simmers and coats pasta, 2 to 3 minutes.
Season with salt and pepper.
Transfer pasta to wide shallow bowl.
Sprinkle with breadcrumbs.
Serve, passing additional Parmesan cheese alongside.
Makes 4 servings.
To make fresh whole wheat breadcrumbs, cut off the crust from country-style bread. Tear the bread into two-inch pieces and grind in the food processor until the breadcrumbs resemble very coarse sand.
Recipe came from an unidentified magazine
Saturday, January 21, 2012
Recommended Restaurant: Tea Leaf II Chinese-Mandarin Restaurant Cuisine. Lacey, WA

There are many times when I just crave a good Chow Mein or a Beef with Broccoli meal. There are a few Chinese places in the Olympia area we have tried, but nothing that makes us want to come back. My family and I were headed out for dinner one evening and didn’t have a specific place in mind to go. We were feeling a little adventurous wanting to try a new place to eat. A friend had told me about this Chinese restaurant that was good, so we decided to try it. It was so unbelievably good we eat there about once a week. The kids love their Mushroom Chicken, Vegetable or Chicken Chow Mein, Cashew Chicken, and Beef with Broccoli. Although I have tried numerous items on their menu I always go back to their amazing Mongolian Beef, as does my husband. We also can’t get enough of their Hot and Sour Soup.
To begin they bring a teapot of hot tea and sometimes a bowl of egg flower soup (which my son gobbles up and will eat his sisters bowl too). The staff is very friendly. The food comes to you quick and steaming hot. The food, especially the vegetables, taste very fresh. The restaurant is nothing spectacular but the food is amazing! It is by far the best we have found in town for Chinese food. We find the prices to be very reasonable for dinner, considering the quality of food and amount of food that is served to us.
The name of the restaurant is Tea Leaf II Chinese-Mandarin Restaurant Cuisine. The address is: 4646 Pacific Ave SE, Lacey, WA 98503. They do dine in or take out. They also have a big banquet room for special events.
Sunday, January 15, 2012
Food Fact: Red-Pepper Flakes
Red-Pepper Flakes are best known as a seasoning for pizza, these dried crushed chiles add heat to more than just a Sicilian slice.
 A Hot Spice. It is made up of crumbled dried chiles and their seeds, red-pepper flakes can pack a lot of heat. The type of chile used (such as ancho or cayenne) can vary by brand, so test the level of spiciness before adding to a dish.
Flavor Enhancer. Chiles get their heat from capsaicin, a compound which also help accentuate other flavors in food. Red-pepper flakes add zest to egg dishes, soups, stews, and vegetable sautes. You can also use them in spice rubs or marinades. They are a popular spice in Italian cooking - you can cook them briefly in olive oil with minced garlic, then drizzle the spicy oil over polenta or use it as a base for pasta sauces.
Buying and Storing. This spice is often labeled "crushed red pepper." Look for bright red flakes that haven't begun to brown and seeds that are pale yellow. Store in a cool, dry place and buy often (every 6 months or so) as the spice tends to lose its pungency quickly.
Martha Stewart Everyday Living Magazine (date unknown)
Saturday, October 15, 2011
Recipe: Caramel Apple Bites

Caramel Apple Bites
1 (14 ounce) bag Kraft original caramels
1/4 cup heavy whipping cream
Apples, granny smiths work great
orange sprinkles
1 melon baller
toothpicks
Wash each apple and dry completely.
Unwrap each caramel and place in a microwave safe dish.
Microwave for 1 minute, stir.
Add heavy whipping cream and microwave for 30 second intervals until completely caramel is melted.
Use the melon baller and go around the apple making bite sized pieces, place apple pieces on paper towel and pat dry.
Take 1 toothpick and stick on the top of the apple (skin side up) and dip apple bite in caramel until completely coated.
Dip the bottom of caramel in sprinkles, or other favorite coating, if desired.
Place caramel apple bite on wax paper.
Enjoy!

Sunday, October 2, 2011
Recipe: Spinach Salad with Dressing

This salad is a nice change, fresh, and has a nice crispy, satisfying crunch to it.
Salad
1 bag of fresh spinach
1 cup of bean sprouts
4 slices of bacon, cooked and broken into small pieces
½ cup slivered almonds
1 small can of water chestnuts, optional.
Place all ingredients in a big bowl and set aside.
Dressing
½ cup vegetable oil
2 Tablespoons red wine vinegar
2 Tablespoons ketchup
1/3 cup sugar
2 small green onions, finely chopped
Place all ingredients into a jar with a tightly fit lid.
Shake to combine.
Chill in refrigerator for 1 hour.
Mix dressing and salad and serve immediately.
Makes 4-6 servings.
Friday, September 23, 2011
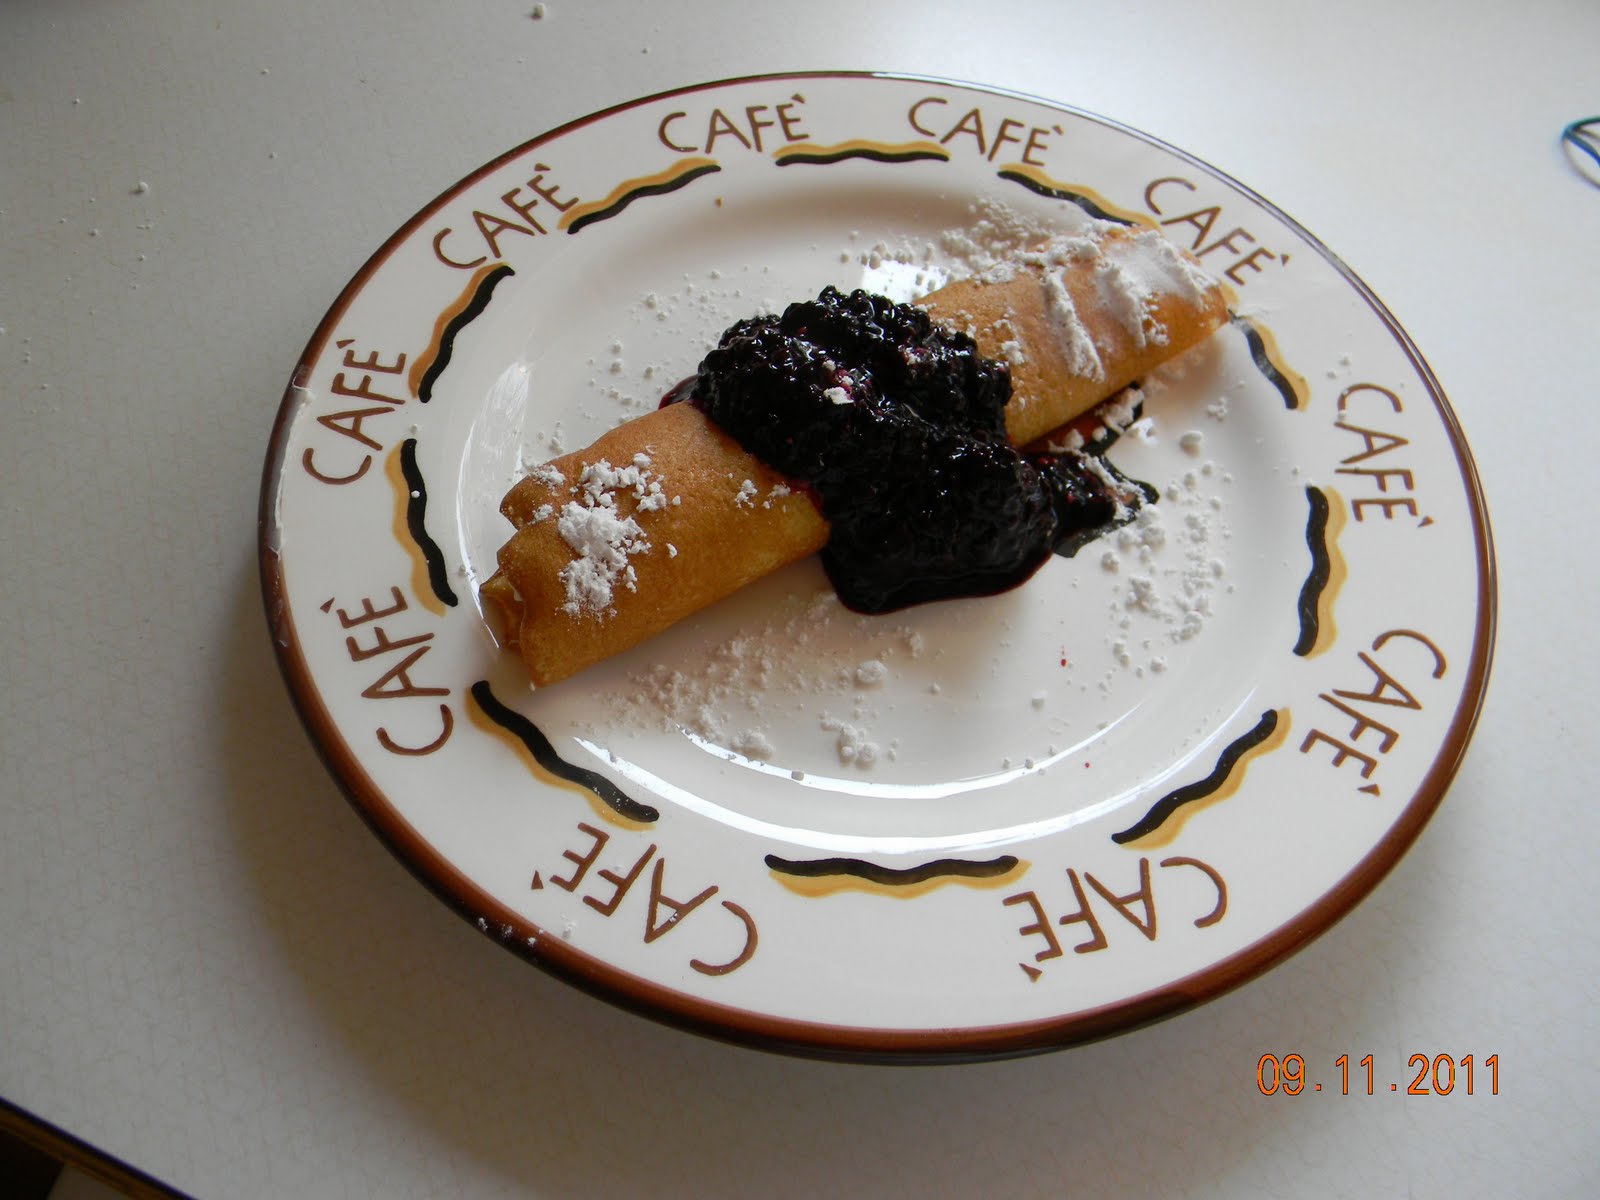
Recipe: Basic Dessert Crepes
One of my favorite things I hardly ever make is Crepes, especially dessert crepes. They are really thin, somewhat sweet and remind me of really thin pancakes. I love filling it with a mixture of cream cheese and powdered sugar, rolling it up, and drizzling the top of the crepe with a favorite jam, fresh fruit, or chocolate sauce, then sprinkling it with powdered sugar. I had an instant craving for them so I whipped up a small batch of them. Yum!
Basic Dessert Crepe Batter
2 eggs
1/2 cup flour
1 tablespoon sugar
1/2 cup milk
1/8 cup water
1/2 tablespoon melted butter
In a blender, combine ingredients in a blender jar; blend for about 1 minute.
Scrape down sides with rubber spatula and blend for another 15 seconds or until smooth.
Refrigerate for at least 1 hour.
Preheat a traditional crepe pan on medium-high heat.Taking about 1/8 cup pour batter in pan and immediately tilt pan in all directions, swirling the batter to cover the bottom of the pan in a very thin layer.
Return the pan to the heating unit and cook until the botton is browned, 1 minute.
Turn the crepe over and brown the other side for a few seconds.
Remove from pan and stack on plate.
Repeat until all batter is used up.
Makes 10-15 crepes.
Crepe Cookery cookbook by Mable Hoffman
Saturday, September 17, 2011
Recipe: Creamy Mashed Potatoes
If you are the type that loves really creamy, yummy, hot, fresh, just absolutely delicious mashed potatoes then these are the ones for you. Ever since I saw the recipe for these on The Pioneer Womens blog I have wanted to make them. So I finally I got to make them. These mashed potatoes are really easy and the results were just delicious. I was so full but I still kept going back for more helpings of potatoes. Now this is what you definately call comfort food. I made these mashed postates for dinner with garlic chicken and a green salad.
Creamy Mashed Potatoes
2 1/2 pounds Russet potatoes
1/2 stick of butter
1/2 package (4 ounces) cream cheese, softened
1/4 cup half-n-half
1/2 teaspoon Lawry's Seasoning Salt
1/2 teaspoon black pepper
Peel and cut potatoes till they are about the same size.
Place in a pan and fill with water just till the potatoes are barely covered.
Bring to a boil and cook till potatoes are fork tender, and can easily be cut in half.
Drain water and place pan back on stove with the heat turned to low.
Mash potatoes. Mash potatoes some more.
Add butter, cream cheese, seasoning salt, and black pepper.
Mash some more until all ingredients are mixed together well.
Place in an oven proof dish and add a few slices of butter on top.
Place in an oven at 350 degrees for 15-20 minutes until butter is melted and potatoes are warmed through.
Makes 4-6 servings
Wednesday, September 14, 2011
Recipe: Blackberry Jam
On the property of our house are blackberries, lots of blackberries. When we moved in, the previous tenants warned us about them. At first I didn’t really notice them since it was the wrong season for them. Now since summer I can’t keep the blackberry bushes trimmed back fast enough. The majority of them are near our mailbox which I’m sure is inconvenient for our postal person delivering our mail. My son went out a few weekends ago and picked a big bowl full. We ate them raw. This last weekend my son and I both went out and picked 5 cups worth of blackberries. We had fun but it sure is pokey! I didn't want these delicious, fresh blackberries to go to waste so this batch of blackberries was made into jam! It is perfect for on top of toast, pancakes, or even on a dish of ice cream.

Our blackberry bushes

and more blackberry bushes

and MORE blackberries (that's my little helper, picking blackberries)

mmmm...fresh picked blackberries
Blackberry Jam
5 cups fresh blackberries
1/2 cup sugar
1 tablespoon fresh lemon juice
1/4 teaspoon kosher salt
In a medium saucepan, combine the blackberries, sugar, lemon juice, and salt.
Mash with a potato masher or wooden spoon until the berries have released their juices.
Cook over medium-high heat, stirring occasionally, until the mixture has thickened, about 18-25 minutes.
Transfer to containers and refrigerate for up to 1 month or freeze for up to 1 year.
Makes 3 cups
Real Simple magazine July 2011 realsimple.com
Sunday, September 11, 2011
Recipe: Date Delight Oatmeal Cookies
I have been in a very big cleaning and organizing mood. My spinning pantry has been on my mind a lot and made the time to clean ingredients out, organize spices, put all the baking and sweet stuff in one section, olive oils, and vinegars together, and the espresso syrups in one place. In the process of doing all of this I found a box of chopped dates (which I knew I had and had a specific recipe to make the dates with). I just hadn't made them yet. It was when I turned the chopped dates box over and realized there was a recipe for cookies on the back. I was feeling in a baking mood and read through the recipe to see if it would be something I would like to make. It definately was!
These cookies turned out to be unbelievably delicious. They remind me very much like oatmeal raisin cookies, but instead of raisins there are chopped dates.

Next add flour, baking soda, and cinnamon, and combine into ingredients.
Finally add quick oats and dates and mix together.
Use a teaspoonful to drop mix onto ungreased cookie sheet.
Bake for 11 to 12 minutes ato 350 degrees or until golden brown.
Recipe makes 2 dozen.
Recipe on back of an 8 ounce box of Amport Chopped Dates
These cookies turned out to be unbelievably delicious. They remind me very much like oatmeal raisin cookies, but instead of raisins there are chopped dates.

Date Delight Oatmeal Cookie
1 stick of butter
1/2 cup packed brown sugar
1/4 cup granulated sugar
1 egg
1/2 teaspoon vanilla
3/4 cup all-purpose flour
1/2 teaspoon baking soda
1/2 teaspoon cinnamon
1 1/2 cup Quick Oats
1 (8 ounce) pack chopped dates
Cream butter and both sugars together.
Then add egg and vanilla and combine well.Next add flour, baking soda, and cinnamon, and combine into ingredients.
Finally add quick oats and dates and mix together.
Use a teaspoonful to drop mix onto ungreased cookie sheet.
Bake for 11 to 12 minutes ato 350 degrees or until golden brown.
Recipe makes 2 dozen.
Recipe on back of an 8 ounce box of Amport Chopped Dates
Thursday, September 8, 2011
Random Post: Labor Day Shopping
This Labor Day weekend my mom and I took the two kids down to Oregon to visit their great grandparents and great aunt and uncle. Our husbands were out hiking for the long weekend and neither my mom nor I wanted to sit home alone. One of my highlights I was so excited to get to do (besides visiting family) was to stop at a Penzeys Spices store. We got to the store and was  incredibly disappointed to find it was closed for the holiday. We went on our way down the road and stopped at a Starbucks in a really REALLY nice BIG shopping center to get coffee for the road. I saw a Home Goods store across the parking lot from Starbucks and since we weren’t in much of a hurry to get, we took a wander through. I have been to a couple of Home Goods stores and always thought they had cute decorating and kitchen items. I had mentioned to my mom just an hour before how I would really like to find some Irish Cream latte glasses- those cute tall glasses with the handle. Well I found just that at Home Goods and grabbed two boxes (set of 4) for only $7.99. I was thrilled! I love making coffee in them and during the holidays I make my own peppermint mochas with whipped cream and crushed peppermint on top. It looks so fun and fancy in these glasses.
 incredibly disappointed to find it was closed for the holiday. We went on our way down the road and stopped at a Starbucks in a really REALLY nice BIG shopping center to get coffee for the road. I saw a Home Goods store across the parking lot from Starbucks and since we weren’t in much of a hurry to get, we took a wander through. I have been to a couple of Home Goods stores and always thought they had cute decorating and kitchen items. I had mentioned to my mom just an hour before how I would really like to find some Irish Cream latte glasses- those cute tall glasses with the handle. Well I found just that at Home Goods and grabbed two boxes (set of 4) for only $7.99. I was thrilled! I love making coffee in them and during the holidays I make my own peppermint mochas with whipped cream and crushed peppermint on top. It looks so fun and fancy in these glasses.
Tuesday, September 6, 2011
Random Post: My Most Favorite Kitchen Items
Wooden Spoon. This isn’t just your standard wooden spoon. If I am sautéing something this is the first wooden spoon I grab for. It is comfortable to hold and the way the spoon is made just works so well for what I am doing in the pan. Many years ago my parents visited the East Coast, and on their travels visited the Stonewall Kitchen store where they got this wooden spoon.
Kitchen Aid Mixer. A few miles from where I live there is a cute little community that has an annual garage sale during the summer. I love to go these garage sales. A few years ago this is where I found my Kitchen Aid mixer. The guy selling it said it had only been used a couple of times and was only a couple years old. It was very clean and came with an unopened box of attachments (meat grinder, etc). I had been borrowing my mom’s mixer at the time and really did need one, so I asked the guy selling it how much it was. He said, “$40”. gulp uh, duh, SOLD!!
Martha Stewart Cutting Board. This cutting board I received for our wedding. I was quite desperate for new boards since all my other cutting boards had been cut into too many times and was time to get them replaced. This Martha Stewart cutting board is fantastic and has a no slip backing so doesn’t slid around on the counter while trying to chop. The size of the board is perfect and allows you to have space to push whatever items aside and out of the way of your knife.
Mini Spatula. This little handy kitchen tool has been used more than any of my other spatulas. This one is perfect for scrapping the bottom of a salad dressing jar and has many uses for those small little dishes and spaces you want to scrape clean. I have a dark green so it doesn't stain and is dishwasher safe.
Whisk. Given to me from Pampered Chef. It is the my ultimate favorite for mixing sauces on the stove.
Kitchen Shears: I love having sharp kitchen shears for opening packages of chicken or cutting the fat of chicken breasts. I grab for these all the time. The scissors completely separate into two pieces and they are dishwasher safe.
Subscribe to:
Comments (Atom)